728x90
[1] MQTT 통신
1. Subscribe
1) 라즈베리파이
led.py
import paho.mqtt.client as mqtt
import RPi.GPIO as gpio


class LED:
    def __init__(self):
        gpio.setmode(gpio.BCM)
        self.led_pin = 22
        gpio.setup(self.led_pin,gpio.OUT)

    def led_on(self):
        gpio.output(self.led_pin,gpio.HIGH)

    def led_off(self):
        gpio.output(self.led_pin,gpio.LOW)

    def clean(self):
        gpio.cleanup()
mysensor.py
# mysensor.py
from threading import Thread
import paho.mqtt.client as mqtt
import paho.mqtt.publish as publish
import time
import RPi.GPIO as gpio
import board    # 데이터 송신용 board 모듈 (GPIO.setmode의 board 모드 아님)
import adafruit_dht


class PirSensor(Thread):
    def __init__(self, client):
        Thread.__init__(self)
        gpio.setmode(gpio.BCM)
        self.pir_pin = 5
        gpio.setup(self.pir_pin, gpio.IN)
        self.client = client

    def run(self):
        while True:
            if gpio.input(self.pir_pin) == 1:
                print("motion detected....")
                self.client.publish("iot/pir", "Motion detected....")
            else:
                print("no motion....")
                self.client.publish("iot/pir", "no motion....")
            time.sleep(1)


class MyDHT11(Thread):
    def __init__(self, pin):
        Thread.__init__(self)
        self.mydht11 = adafruit_dht.DHT11(board.D6)  # GPIO06 번 핀

    def run(self):
        while True:
            try:
                humidity_data = self.mydht11.humidity
                temperature_data = self.mydht11.temperature
                print(humidity_data, temperature_data)
                publish.single("iot/dht", "{\"humidity\": "+str(humidity_data)+", \"temperature\": "+str(temperature_data)+"}", hostname="172.30.1.57")
                time.sleep(2)
            except RuntimeError as error:
                print(error.args[0])
            finally:
                pass
mymqtt.py
# mymqtt.py
import paho.mqtt.client as mqtt
from mysensor import MyDHT11
from mysensor import PirSensor
import RPi.GPIO as gpio
from threading import Thread
from led import LED

class MqttWorker:
    def __init__(self):
        self.client = mqtt.Client()
        self.client.on_connect = self.on_connect
        self.client.on_message = self.on_message
        self.led = LED()
        self.pir = PirSensor(self.client)
        self.mydht = MyDHT11(6)
        # self.pir.daemon = True
        self.pir.start()
        self.mydht.start()

    def mymqtt_connect(self):
        try:
            print("브로커 연결 시작하기")
            self.client.connect("XXX.XXX.XXX.XXX", 1883, 60)
            mythreadobj = Thread(target=self.client.loop_forever)
            mythreadobj.start()
        except KeyboardInterrupt:
            pass
        finally:
            print("종료")

    def on_connect(self, client, userdata, flags, rc):
        print("connect..."+str(rc))
        if rc == 0:
            self.client.subscribe("android/led")
        else:
            print("연결 실패.....")

    def on_message(self, client, userdata, message):
        myval = message.payload.decode("utf-8")
        print(message.topic+"-----"+myval)
        if myval == "led_on":
            self.led.led_on()
        elif myval == "led_off":
            self.led.led_off()


if __name__ == "__main__":
    try:
        mqtt = MqttWorker()
        mqtt.mymqtt_connect()
        for i in range(10):
            print(i)
    except KeyboardInterrupt:
        pass
    finally:
        # gpio.cleanup()
        print("종료")
web_subpub_test.py
# web_subpub_test.py
from mymqtt import MqttWorker
import RPi.GPIO as gpio
import time


try:
    mqtt = MqttWorker()
    mqtt.mymqtt_connect()
    while True:
        time.sleep(1)
    # for i in range(10):
    #     print(i)
except KeyboardInterrupt:
    pass
finally:
    gpio.cleanup()
    print("종료")
2) 안드로이드
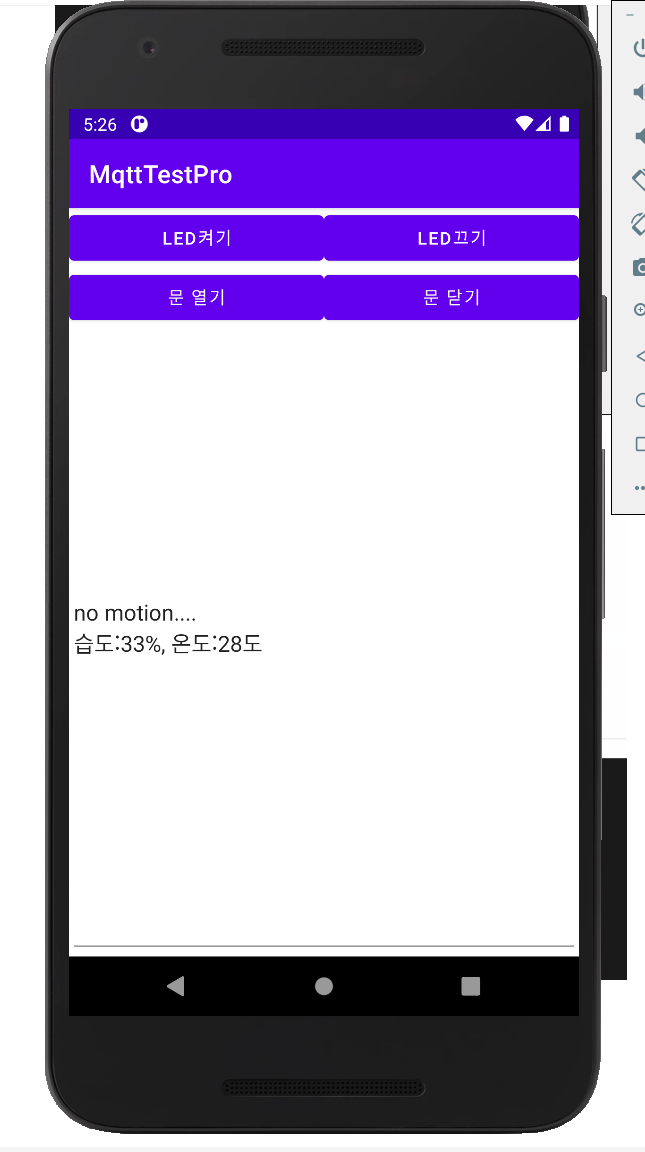
activity_main.xml
<?xml version="1.0" encoding="utf-8"?>
<LinearLayout xmlns:android="http://schemas.android.com/apk/res/android"
    xmlns:app="http://schemas.android.com/apk/res-auto"
    xmlns:tools="http://schemas.android.com/tools"
    android:orientation="vertical"
    android:layout_width="match_parent"
    android:layout_height="match_parent"
    tools:context=".MqttTestActivity">
    <LinearLayout
        android:orientation="horizontal"
        android:layout_width="match_parent"
        android:layout_height="wrap_content">
        <Button
            android:id="@+id/btn_led_on"
            android:layout_width="wrap_content"
            android:layout_height="wrap_content"
            android:layout_weight="1"
            android:text="led켜기"/>
        <Button
            android:id="@+id/btn_led_off"
            android:layout_width="wrap_content"
            android:layout_height="wrap_content"
            android:layout_weight="1"
            android:text="led끄기"/>
    </LinearLayout>
    <LinearLayout
        android:orientation="horizontal"
        android:layout_width="match_parent"
        android:layout_height="wrap_content">
        <Button
            android:id="@+id/btn_door_open"
            android:layout_width="wrap_content"
            android:layout_height="wrap_content"
            android:layout_weight="1"
            android:text="문 열기"/>
        <Button
            android:id="@+id/btn_door_close"
            android:layout_width="wrap_content"
            android:layout_height="wrap_content"
            android:layout_weight="1"
            android:text="문 닫기"/>
    </LinearLayout>
    <EditText
        android:id="@+id/showdata"
        android:layout_width="match_parent"
        android:layout_height="match_parent" />


</LinearLayout>
MyMqtt.kt
package com.example.mqtttestpro

import android.content.Context
import android.util.Log
import org.eclipse.paho.android.service.MqttAndroidClient
import org.eclipse.paho.client.mqttv3.*

class MyMqtt(context:Context, uri:String) {
    // 안드로이드에서 mqtt통신을 수행할 객체 -> MqttAndroidClient
    var mqttClient:MqttAndroidClient = MqttAndroidClient(context, uri, MqttClient.generateClientId())

    // 메시지가 수신되면 callback 메소드가 호출될 수 있도록 등록 ------------------------------------3)
    fun setCallback(callback: (topic:String, message:MqttMessage)->Unit){
        mqttClient.setCallback(object:MqttCallback{
            override fun connectionLost(cause: Throwable?) {
                Log.d("mymqtt", "connectionLost")
            }

            override fun messageArrived(topic: String?, message: MqttMessage?) {
                // 메시지가 수신되면 호출 - activity에 callback 메소드를 정의
                Log.d("mymqtt", "messageArrived")
                callback(topic!!, message!!)
            }

            // 메시지 송신할 경우 호출되는 메소드(publish 되면 호출됨)
            override fun deliveryComplete(token: IMqttDeliveryToken?) {
                Log.d("mymqtt", "deliveryComplete")
            }

        })
    }

    // mqtt통신을 하기 위해 브로커 서버와 연결, 연결이 끝난 후 콜백메소드 설정
    fun connect(topic:Array<String>){
        // 연결하기 위해서 필요한 여러가지 정보를 담고 있는 객체
        val mqttConnectOptions = MqttConnectOptions()
        // mqttAndroidClient 객체의 connect를 호출하며 브로커에 연결을 시도
        // 안드로이드 내부에서 브로커에 연결을 성공하면 자동으로 이벤트가 발생하며 이를 처리하는 리스너가 IMqttActionListener
        mqttClient.connect(mqttConnectOptions,null, object:IMqttActionListener{
            override fun onSuccess(asyncActionToken: IMqttToken?) {
                // 접속 성공
                Log.d("mymqtt", "브로커 접속 성공....")
                // 브로커 접속 성공하면 subscribe하기----------------------------------------------2)
                // topic을 여러 개 subscribe 할 수 있으므로 배열처리
                // 모든 전달된 topic을 subscribe
                // for문이나 if문으로 처리할 수 있는데 map함수를 이용하면 편하게 작업가능
                topic.map {
                    subscribeTopic(it)
                }
            }

            override fun onFailure(asyncActionToken: IMqttToken?, exception: Throwable?) {
                // 접속 실패
                Log.d("mymqtt", "브로커 접속 실패....")
            }
        })
    }

    // 토픽을 subscribe로 등록하기 위해서 메소드 구현 -----------------------------------------------1)
    private fun subscribeTopic(topic:String, qos:Int=0){
        mqttClient.subscribe(topic, qos,null, object:IMqttActionListener{
            override fun onSuccess(asyncActionToken: IMqttToken?) {
                Log.d("mymqtt", "subscribe 성공...")
            }

            override fun onFailure(asyncActionToken: IMqttToken?, exception: Throwable?) {
                Log.d("mymqtt", "subscribe 실패...")
            }

        })
    }

    // 토픽을 publish 하기 위한 메소드 구현
    fun publish(topic:String, payload:String, qos:Int=0){
        if(!mqttClient.isConnected){
            mqttClient.connect()
        }
        val message = MqttMessage()
        // 메시지객체에 payload와 메시지 전송 품질(qos) 설정
        // 네트워크로 전송되도록 byte로 변경
        message.payload = payload.toByteArray()
        message.qos = qos
        // 메시지 전송하기 (publish) - publish가 성공/실패하는 경우 이벤트가 발생하기 때문에 리스너 등록
        // mqttClient.publish(topic, message) // 이렇게만 publish해도 됨
        // publish 후 콜백이 실행되도록 하고 싶다면 다음과 같이 publish
        mqttClient.publish(topic, message, null, object:IMqttActionListener{
            override fun onSuccess(asyncActionToken: IMqttToken?) {
                Log.d("mymqtt", "메시지 전송 성공...")
            }

            override fun onFailure(asyncActionToken: IMqttToken?, exception: Throwable?) {
                Log.d("mymqtt", "메시지 전송 실패...")
            }
        })
    }


}
MqttTestActivity.kt
package com.example.mqtttestpro

import androidx.appcompat.app.AppCompatActivity
import android.os.Bundle
import android.util.Log
import android.view.View
import kotlinx.android.synthetic.main.activity_main.*
import org.eclipse.paho.client.mqttv3.MqttMessage

// 화면디자인 - 화면에 있는 위젯들의 이벤트에 반응하는 처리만 구현
class MqttTestActivity : AppCompatActivity(), View.OnClickListener {
    val sub_topic = "iot/#"
    val server_uri = "tcp://XXX.XXX.XXX.XXX:1883"   // broker의 ip와 port
    var mymqtt:MyMqtt? = null
    override fun onCreate(savedInstanceState: Bundle?) {
        super.onCreate(savedInstanceState)
        setContentView(R.layout.activity_main)
        // MQTT 통신을 수행할 MQTT 객체를 생성
        mymqtt = MyMqtt(this, server_uri)

        // 브로커에서 메시지 전달되면 호출될 메소드를 넘기기
        mymqtt?.setCallback(::onMessage)

        // broker 연결
        mymqtt?.connect(arrayOf<String>(sub_topic))


        // 이벤트 연결
        btn_led_on.setOnClickListener(this)
        btn_led_off.setOnClickListener(this)
        btn_door_open.setOnClickListener(this)
        btn_door_close.setOnClickListener(this)
    }

    override fun onClick(v: View?) {
        var data = arrayOf<String>()
        data = when(v?.id){
            R.id.btn_led_on -> arrayOf("led", "led_on")
            R.id.btn_led_off -> arrayOf("led", "led_off")
            R.id.btn_door_open -> arrayOf("door", "door_open")
            R.id.btn_door_close -> arrayOf("door", "door_close")
            else -> arrayOf()
        }
        mymqtt?.publish("android/${data[0]}", data[1])
    }

    // 액티비티 내부에 디자인된 위젯을 액세스해야 하므로 외부 클래스에 있으면 액티비티의 구성요소를 접근하기 위해서 액티비틑 넘겨주어야 하는 번거로움을 없애기 위해서 액티비티 내부에 메소드를 정의
    fun onMessage(topic:String, message:MqttMessage){
        // 메시지의 수신을 처리
        // EditText에 내용을 출력하기, 영상출력 등...
        val msg = String(message.payload)
        if(topic=="iot/pir"){
            showdata.setText(msg+"\n")
        }else if(topic=="iot/dht"){
            showdata.append(msg+"\n")
        }
        Log.d("mymqtt", msg)
    }

}
- 끝 -
728x90


