[1] Layout
1. FrameLayout
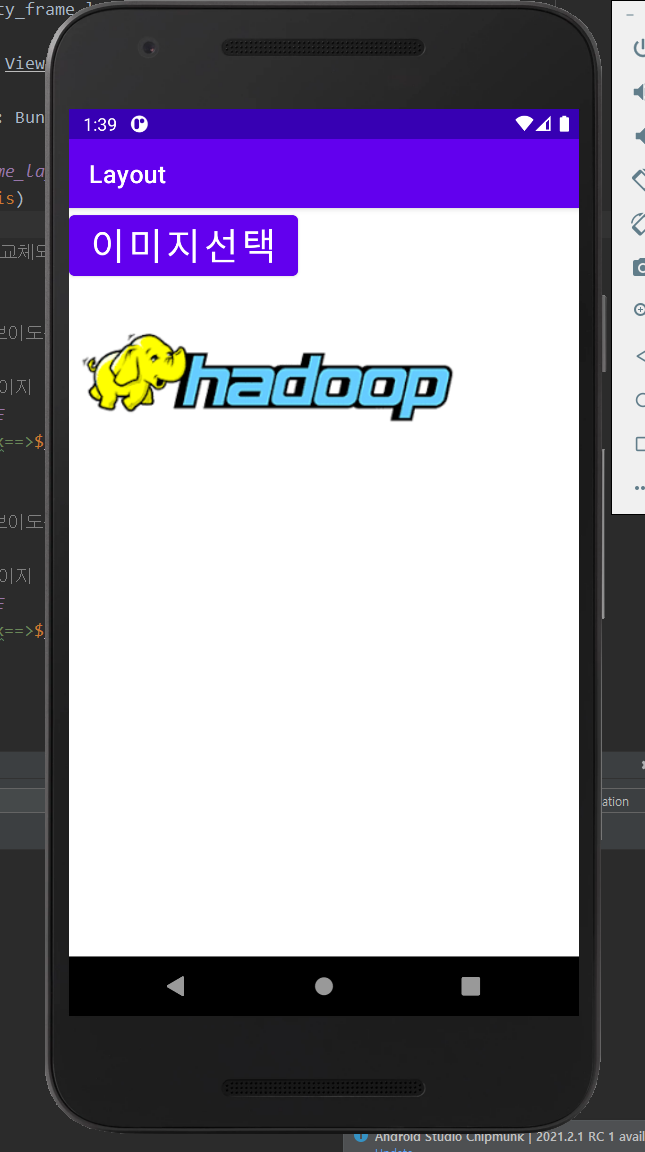
- 이벤트(버튼 클릭 등)를 통해서, 액티비티 전체가 아닌, 특정 부분만 변경시키고 싶은 경우 해당 부분을 Frame Layout으로 만들어 준다.
1) 예제1
activity_frame_layout_test.xml
<?xml version="1.0" encoding="utf-8"?>
<LinearLayout xmlns:android="http://schemas.android.com/apk/res/android"
xmlns:app="http://schemas.android.com/apk/res-auto"
xmlns:tools="http://schemas.android.com/tools"
android:orientation="vertical"
android:layout_width="match_parent"
android:layout_height="match_parent"
tools:context=".FrameLayoutTest">
<Button
android:id="@+id/btnimagechange"
android:layout_width="wrap_content"
android:layout_height="wrap_content"
android:gravity="center"
android:text="이미지선택"
android:textSize="30sp"/>
<FrameLayout
android:layout_width="match_parent"
android:layout_height="match_parent">
<ImageView
android:id="@+id/img01"
android:layout_width="wrap_content"
android:layout_height="wrap_content"
android:visibility="visible"
android:src="@drawable/hadoop"/>
<ImageView
android:id="@+id/img02"
android:layout_width="wrap_content"
android:layout_height="wrap_content"
android:visibility="invisible"
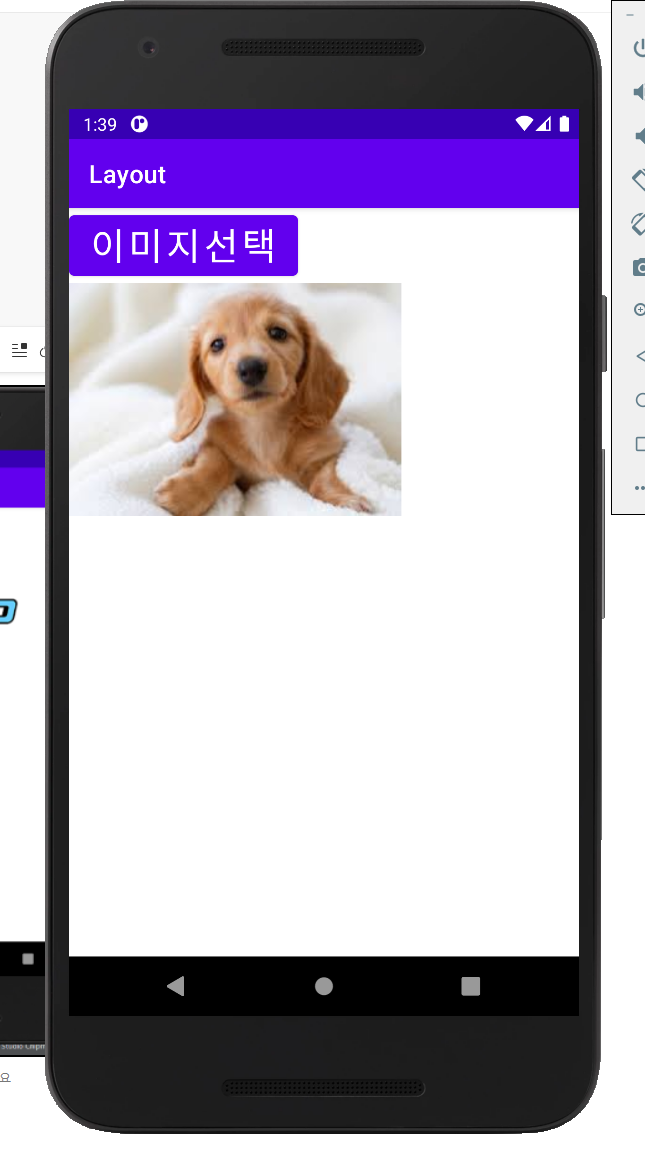
android:src="@drawable/dog"/>
</FrameLayout>
</LinearLayout>FrameLayoutText.kt
package com.example.layout

import androidx.appcompat.app.AppCompatActivity
import android.os.Bundle
import android.util.Log
import android.view.View
import kotlinx.android.synthetic.main.activity_frame_layout_test.*

class FrameLayoutTest : AppCompatActivity(), View.OnClickListener {
    var index = 0
    override fun onCreate(savedInstanceState: Bundle?) {
        super.onCreate(savedInstanceState)
        setContentView(R.layout.activity_frame_layout_test)
        btnimagechange.setOnClickListener(this)
    }
    // 이미지선택 버튼이 선택될 때마다 이미지가 교체되어 보이도록 구현
    override fun onClick(v: View?) {
        if(index==0){
            // 0번에 해당하는 이미지를 화면에 보이도록 설정
            img02.visibility = View.VISIBLE
            // 기존에 보였던 이미지는 화면에 보이지 않도록 설정
            img01.visibility = View.INVISIBLE
            Log.d("test", "현재index==>$index")
            index = 1
        }else if(index==1){
            // 0번에 해당하는 이미지를 화면에 보이도록 설정
            img01.visibility = View.VISIBLE
            // 기존에 보였던 이미지는 화면에 보이지 않도록 설정
            img02.visibility = View.INVISIBLE
            Log.d("test", "현재index==>$index")
            index = 0
        }
    }
}
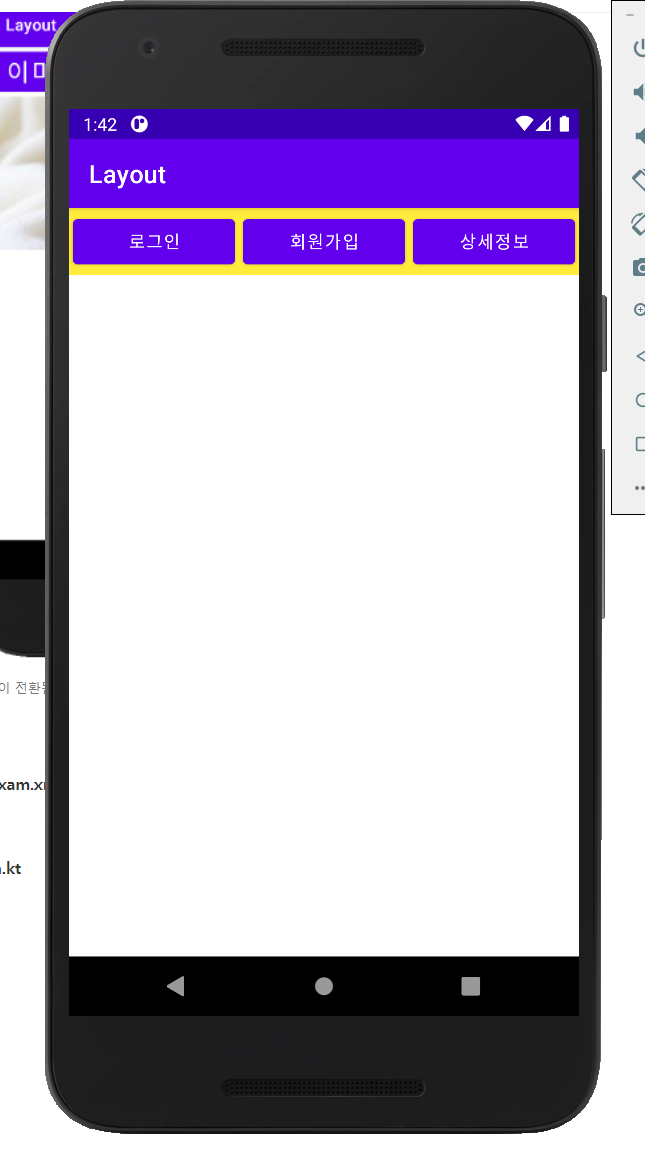
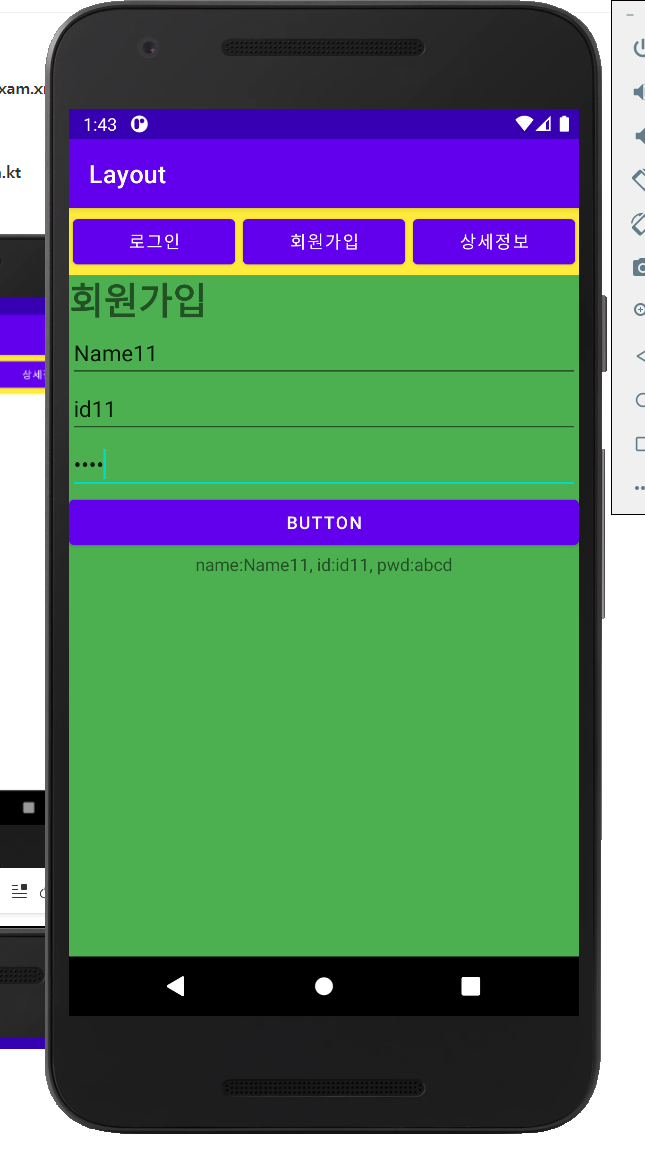
2) 예제2
activity_frame_layout_exam.xml
<?xml version="1.0" encoding="utf-8"?>
<LinearLayout xmlns:android="http://schemas.android.com/apk/res/android"
xmlns:app="http://schemas.android.com/apk/res-auto"
xmlns:tools="http://schemas.android.com/tools"
android:orientation="vertical"
android:layout_width="match_parent"
android:layout_height="match_parent"
tools:context=".FrameLayoutExam">
<LinearLayout
android:layout_width="match_parent"
android:layout_height="wrap_content"
android:orientation="horizontal"
android:background="#FFEB3B">
<Button
android:id="@+id/BTN_LOGIN"
android:layout_width="0dp"
android:layout_height="wrap_content"
android:layout_weight="1"
android:layout_margin="3dp"
android:text="로그인"/>
<Button
android:id="@+id/BTN_REG"
android:layout_width="0dp"
android:layout_height="wrap_content"
android:layout_weight="1"
android:layout_margin="3dp"
android:text="회원가입"/>
<Button
android:id="@+id/BTN_DETAIL"
android:layout_width="0dp"
android:layout_height="wrap_content"
android:layout_weight="1"
android:layout_margin="3dp"
android:text="상세정보"/>
</LinearLayout>
<FrameLayout
android:id="@+id/frame"
android:layout_width="match_parent"
android:layout_height="match_parent">
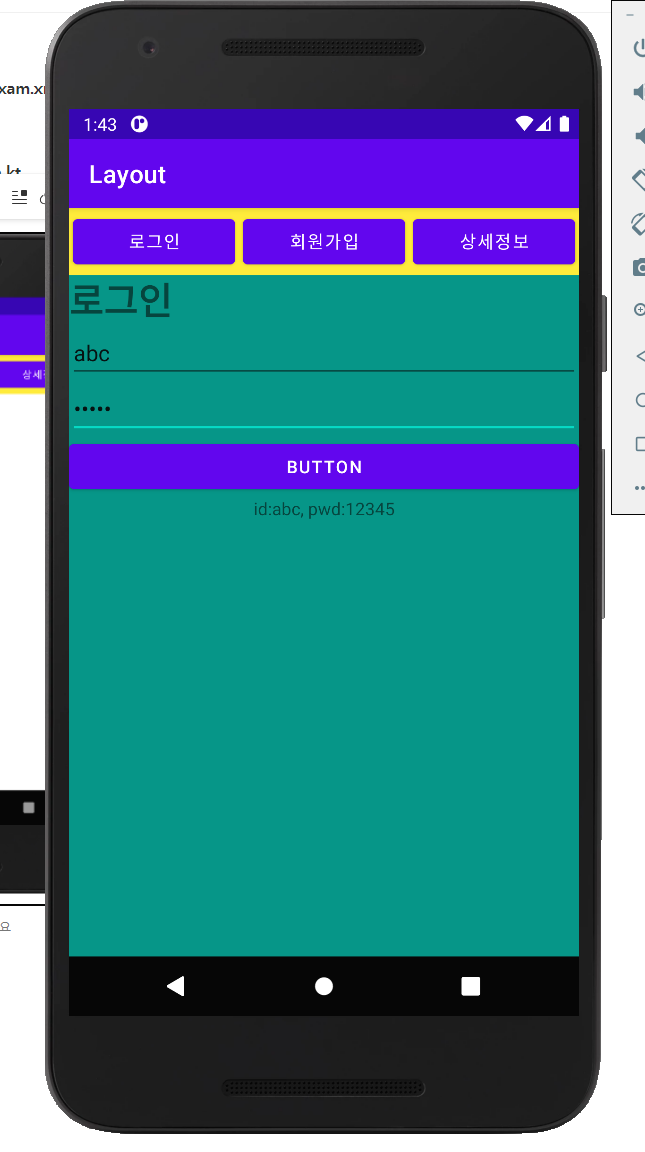
<LinearLayout
android:id="@+id/frame_login"
android:layout_width="match_parent"
android:layout_height="match_parent"
android:orientation="vertical"
android:background="#009688"
android:visibility="invisible">
<TextView
android:id="@+id/txtlogintitle"
android:layout_width="match_parent"
android:layout_height="wrap_content"
android:text="로그인"
android:textSize="30sp"
android:textStyle="bold"/>
<EditText
android:id="@+id/edit_id"
android:layout_width="match_parent"
android:layout_height="wrap_content"
android:text="id"/>
<EditText
android:id="@+id/edit_pwd"
android:layout_width="match_parent"
android:layout_height="wrap_content"
android:inputType="textPassword"
android:text=""/>
<Button
android:id="@+id/btn_login_imple"
android:layout_width="match_parent"
android:layout_height="wrap_content"
android:text="button"/>
<TextView
android:id="@+id/text_result_login"
android:layout_width="match_parent"
android:layout_height="wrap_content"
android:text=""
android:gravity="center"/>
</LinearLayout>
<LinearLayout
android:id="@+id/frame_reg"
android:layout_width="match_parent"
android:layout_height="match_parent"
android:orientation="vertical"
android:background="#4CAF50"
android:visibility="invisible">
<TextView
android:id="@+id/textregtitle"
android:layout_width="match_parent"
android:layout_height="wrap_content"
android:text="회원가입"
android:textSize="30sp"
android:textStyle="bold"/>
<EditText
android:id="@+id/edit_reg_name"
android:layout_width="match_parent"
android:layout_height="wrap_content"
android:inputType="textPersonName"
android:text="Name"/>
<EditText
android:id="@+id/edit_reg_id"
android:layout_width="match_parent"
android:layout_height="wrap_content"
android:text="id"/>
<EditText
android:id="@+id/edit_reg_pwd"
android:layout_width="match_parent"
android:layout_height="wrap_content"
android:inputType="textPassword"
android:text=""/>
<Button
android:id="@+id/btn_reg_imple"
android:layout_width="match_parent"
android:layout_height="wrap_content"
android:text="button"/>
<TextView
android:id="@+id/text_result_reg"
android:layout_width="match_parent"
android:layout_height="wrap_content"
android:text=""
android:gravity="center"/>
</LinearLayout>
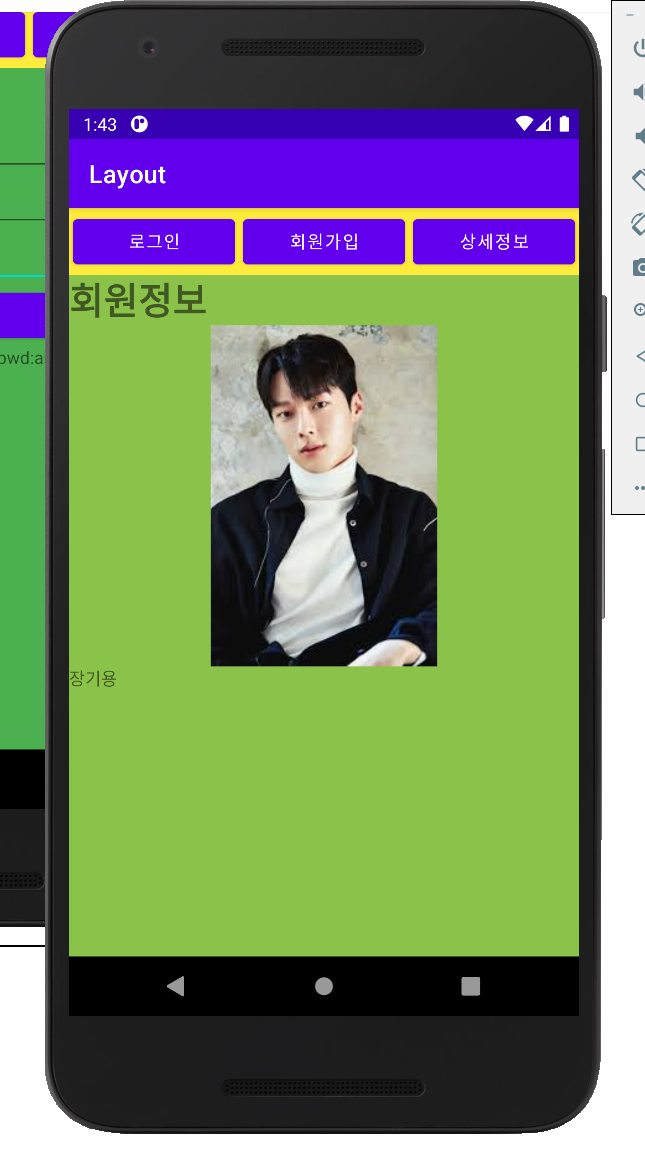
<LinearLayout
android:id="@+id/frame_info"
android:layout_width="match_parent"
android:layout_height="match_parent"
android:orientation="vertical"
android:background="#8BC34A"
android:visibility="invisible">
<TextView
android:id="@+id/txtinfotitle"
android:layout_width="match_parent"
android:layout_height="wrap_content"
android:text="회원정보"
android:textSize="30sp"
android:textStyle="bold"/>
<ImageView
android:id="@+id/infoimg"
android:layout_width="match_parent"
android:layout_height="wrap_content"
android:src="@drawable/img01"/>
<TextView
android:id="@+id/txtimgInfo"
android:layout_width="match_parent"
android:layout_height="wrap_content"
android:text="장기용"/>
</LinearLayout>
</FrameLayout>
</LinearLayout>FrameLayoutExam.kt
package com.example.layout

import androidx.appcompat.app.AppCompatActivity
import android.os.Bundle
import android.view.View
import kotlinx.android.synthetic.main.activity_frame_layout_exam.*

class FrameLayoutExam : AppCompatActivity(), View.OnClickListener{
    override fun onCreate(savedInstanceState: Bundle?) {
        super.onCreate(savedInstanceState)
        setContentView(R.layout.activity_frame_layout_exam)
        BTN_LOGIN.setOnClickListener(this)
        BTN_REG.setOnClickListener(this)
        BTN_DETAIL.setOnClickListener(this)
        btn_login_imple.setOnClickListener{
            val id = edit_id.text.toString()
            val pwd = edit_pwd.text.toString()
            text_result_login.text = "id:$id, pwd:$pwd"
        }
        btn_reg_imple.setOnClickListener{
            val name = edit_reg_name.text.toString()
            val id = edit_reg_id.text.toString()
            val pwd = edit_reg_pwd.text.toString()
            text_result_reg.text = "name:$name, id:$id, pwd:$pwd"
        }

    }

    override fun onClick(v: View?) {
        when(v?.id){
            R.id.BTN_LOGIN -> {
                frame_login.visibility = View.VISIBLE
                frame_reg.visibility = View.INVISIBLE
                frame_info.visibility = View.INVISIBLE
            }
            R.id.BTN_REG -> {
                frame_login.visibility = View.INVISIBLE
                frame_reg.visibility = View.VISIBLE
                frame_info.visibility = View.INVISIBLE
            }
            R.id.BTN_DETAIL -> {
                frame_login.visibility = View.INVISIBLE
                frame_reg.visibility = View.INVISIBLE
                frame_info.visibility = View.VISIBLE
            }
        }
    }
}
2. Scroll View
- 화면보다 긴 경우 scroll이 가능하도록
- ScrollView의 하위 view는 한 개만 정의해야 한다.
- android:fillViewport 속성을 true로 추가해야 한다.
<?xml version="1.0" encoding="utf-8"?>
<LinearLayout xmlns:android="http://schemas.android.com/apk/res/android"
    android:orientation="vertical"
    android:layout_width="match_parent"
    android:layout_height="match_parent">
    <!--
        - ScrollView의 하위 view는 한 개만 정의해야 한다.
        - android:fillViewport 속성을 true로 추가해야 한다.
        -
    -->
    <ScrollView
        android:layout_width="match_parent"
        android:layout_height="match_parent"
        android:fillViewport="true">

        <LinearLayout
            android:layout_width="match_parent"
            android:layout_height="match_parent"
            android:orientation="vertical" >

            <TextView
                android:id="@+id/textView3"
                android:layout_width="300dp"
                android:layout_height="300dp"
                android:text="TextView"
                android:background="#ff0000"/>

            <TextView
                android:id="@+id/textView2"
                android:layout_width="300dp"
                android:layout_height="300dp"
                android:text="TextView"
                android:background="#00ff00"/>

            <TextView
                android:id="@+id/textView"
                android:layout_width="300dp"
                android:layout_height="300dp"
                android:text="TextView"
                android:background="#0000ff"/>
        </LinearLayout>
    </ScrollView>

</LinearLayout>
3. Relative Layout
- RelativeLayout은 상대적이라는 의미이고 상대적이라는 것은 기준이 있어야 한다.
- 기준은 부모 뷰 혹은 특정 뷰
<?xml version="1.0" encoding="utf-8"?>
<RelativeLayout xmlns:android="http://schemas.android.com/apk/res/android"
android:layout_width="match_parent"
android:layout_height="match_parent">
<!-- RelativeLayout은 상대적이라는 의미이고 상대적이라는 것은 기준이 있어야 한다.
- 기준은 부모 뷰 혹은 특정 뷰
-->
<!-- 부모 뷰를 기준으로 이동 -->
<!-- 부모 뷰의 수직/수평 중앙 -->
<TextView
android:id="@+id/firstview"
android:layout_width="50dp"
android:layout_height="50dp"
android:background="#ff0000"
android:layout_centerInParent="true"/>
<!-- 특정 뷰를 기준으로 -->
<TextView
android:layout_width="30dp"
android:layout_height="30dp"
android:background="#920FF0"
android:layout_centerInParent="true"
android:layout_alignLeft="@id/firstview"
android:layout_alignBottom="@id/firstview"/>
<!-- 부모 뷰의 아래쪽으로 -->
<TextView
android:layout_width="50dp"
android:layout_height="50dp"
android:background="#00ff00"
android:layout_alignParentBottom="true"/>
<!-- 부모 뷰의 오른쪽 -->
<TextView
android:layout_width="50dp"
android:layout_height="50dp"
android:background="#ffff00"
android:layout_alignParentRight="true"/>
<!-- 부모 뷰의 수평 중앙 -->
<TextView
android:layout_width="50dp"
android:layout_height="50dp"
android:background="#ff00ff"
android:layout_centerHorizontal="true"/>
<!-- 부모 뷰의 수직 중앙 -->
<TextView
android:layout_width="50dp"
android:layout_height="50dp"
android:background="#00ffff"
android:layout_centerVertical="true"/>
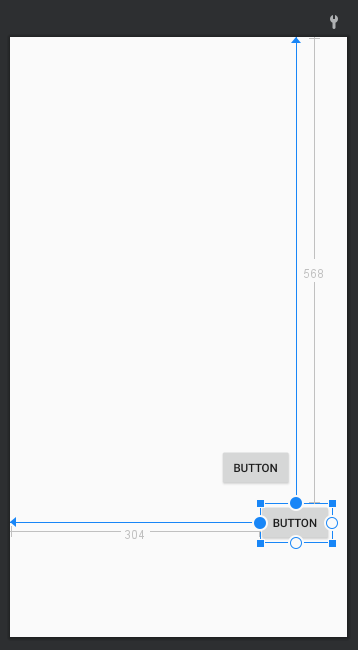
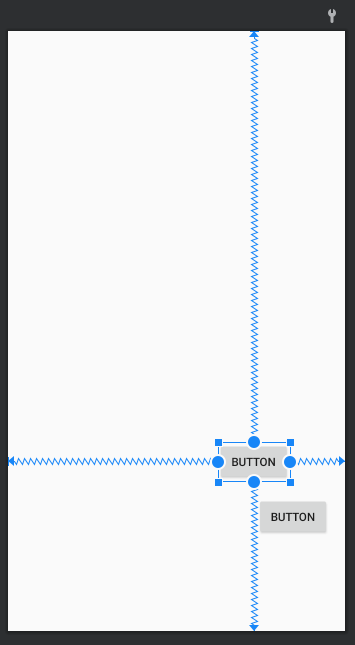
</RelativeLayout>4. Constraint Layout
- Relative Layout보다 유연하게 사용할 수 있는 레이아웃
- 구속 조건을 길이로 줄 수도 있고, 비율로 줄 수도 있다.
- 길이로 구속하면 화면이 작아질 경우 화면 밖으로 나갈 수도 있다.
- 비율로 줄 경우 화면 크기에 관계 없이 일정한 위치에 위치하게 된다.
5. Table Layout
- 말 그대로 테이블 같은 모양을 만들 수 있다.
<?xml version="1.0" encoding="utf-8"?>
<LinearLayout xmlns:android="http://schemas.android.com/apk/res/android"
    android:orientation="vertical" android:layout_width="match_parent"
    android:layout_height="match_parent">
    <TableLayout
        android:layout_width="match_parent"
        android:layout_height="match_parent"
        android:stretchColumns="0, 1, 2">
        <TableRow
            android:layout_width="match_parent"
            android:layout_height="match_parent">
            <Button
                android:layout_width="wrap_content"
                android:layout_height="wrap_content"
                android:text="btn1"/>
            <Button
                android:layout_width="wrap_content"
                android:layout_height="wrap_content"
                android:text="btn2"/>
            <Button
                android:layout_width="wrap_content"
                android:layout_height="wrap_content"
                android:text="btn3"/>
        </TableRow>
        <TableRow
            android:layout_width="match_parent"
            android:layout_height="match_parent">
            <EditText
                android:layout_width="wrap_content"
                android:layout_height="wrap_content"
                android:layout_span="2"
                android:text="message"/>
            <Button
                android:layout_width="wrap_content"
                android:layout_height="wrap_content"
                android:text="btn3"/>
        </TableRow>
    </TableLayout>
</LinearLayout>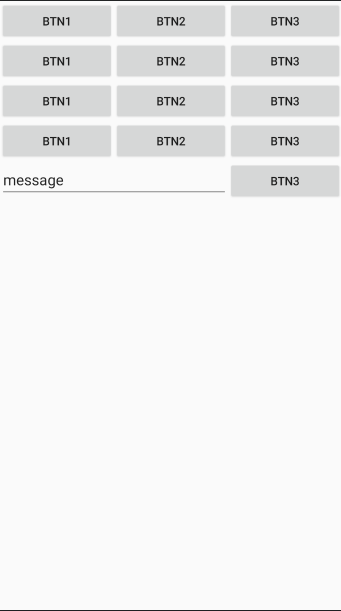
[2] EditText View
- EditText View와 관련된 다양한 속성과 기능 예제
activity_edit_text_test.xml
<?xml version="1.0" encoding="utf-8"?>
<LinearLayout xmlns:android="http://schemas.android.com/apk/res/android"
    xmlns:app="http://schemas.android.com/apk/res-auto"
    xmlns:tools="http://schemas.android.com/tools"
    android:layout_width="match_parent"
    android:layout_height="match_parent"
    android:orientation="vertical"
    tools:context=".EditTextTestActivity">

    <EditText
        android:id="@+id/editmytext"
        android:layout_width="match_parent"
        android:layout_height="wrap_content"
        android:ems="10"
        android:hint="내용입력"
        android:imeOptions="actionDone"
        android:inputType="text" />

<!--    <EditText
        android:id="@+id/editTextTextPassword"
        android:layout_width="match_parent"
        android:layout_height="wrap_content"
        android:ems="10"
        android:inputType="textPassword" />

    <EditText
        android:id="@+id/editTextNumber"
        android:layout_width="match_parent"
        android:layout_height="wrap_content"
        android:ems="10"
        android:inputType="number" />-->

    <Button
        android:id="@+id/btngetdata"
        android:layout_width="match_parent"
        android:layout_height="wrap_content"
        android:text="가져오기" />

    <TextView
        android:id="@+id/txtinfo1"
        android:layout_width="match_parent"
        android:layout_height="wrap_content"
        android:text="TextView"
        android:textAppearance="@style/TextAppearance.AppCompat.Large" />

    <TextView
        android:id="@+id/txtinfo2"
        android:layout_width="match_parent"
        android:layout_height="wrap_content"
        android:imeOptions="actionGo"
        android:text="TextView"
        android:textAppearance="@style/TextAppearance.AppCompat.Large" />

    <TextView
        android:id="@+id/txtinfo3"
        android:layout_width="match_parent"
        android:layout_height="wrap_content"
        android:text="TextView"
        android:textAppearance="@style/TextAppearance.AppCompat.Large" />
</LinearLayout>
EditTextTestActivity.kt
package com.example.basicview

import android.content.Context
import androidx.appcompat.app.AppCompatActivity
import android.os.Bundle
import android.text.Editable
import android.text.TextWatcher
import android.view.inputmethod.EditorInfo
import android.view.inputmethod.InputMethodManager
import android.widget.Toast
import kotlinx.android.synthetic.main.activity_edit_text_test.*

class EditTextTestActivity : AppCompatActivity() {
    override fun onCreate(savedInstanceState: Bundle?) {
        super.onCreate(savedInstanceState)
        setContentView(R.layout.activity_edit_text_test)

        btngetdata.setOnClickListener {
            /*  - EditTExt의 내용이 지워지도록
                - 입력이 완료되면 키보드가 화면에서 없어지도록 설정 - OS 내부에서 제공되는 기능을 가져와서 사용
                    - getSystemService 메소드를 통해 안드로이드 OS의 기능을 가져와서 사용할 수 있다.
                    - 안드로이드가 제공하는 키보드는 하드웨어 키보드와 소프트웨어 키보드로 구분
                    - 하드웨어 키보드는 스마트폰에서 물리적으로 제공하는 키보드로 우리 앱에서 창을 제어하는 것과 관련된 기능을 제공하는 것으로 InputMethodManager를 이용해서 작업
                - focus가 사라지도록
            */
            txtinfo1.text = editmytext.text
            editmytext.setText("")
            // 1. 안드로이드 OS내부에서 제공하는 서비스를 가져오기 - 키보드 제어와 관련된 서비스
            var service = getSystemService(Context.INPUT_METHOD_SERVICE) as InputMethodManager
            // 2. 각각의 ServiceManager 클래스에 맞는 기능을 호출해서 사용
            service.hideSoftInputFromWindow(editmytext.windowToken, 0)
            editmytext.clearFocus()
        }

        // EditText에서 처리할 수 있는 이벤트
        // 1. 사용자가 입력한 내용을 실시간으로 확인할 수 있는 이벤트 - TextWatcher
        // 위의 이벤트를 처리하기 위해서 TextWatcher를 상속해서 익명의 리스너클래스를 작성
        var listener = object:TextWatcher{
            // 문자열이 변경되기 전
            override fun beforeTextChanged(s: CharSequence?, start: Int, count: Int, after: Int) {
                txtinfo1.text = "before:$s"
            }
            // 문자열의 변경이 완료되었을 때
            override fun onTextChanged(s: CharSequence?, start: Int, before: Int, count: Int) {
                txtinfo2.text = "TextChanged:$s"
            }
            // 변경된 문자열이 화면에 표시되었을 때
            override fun afterTextChanged(s: Editable?) {
                txtinfo3.text = "after:$s"
            }
        }
        editmytext.addTextChangedListener(listener)

        // 2. 키보드의 특정 키 모드가 눌렸을 때 선택 : Enter키가 눌렸을 때 발생하는 이벤트
        // android:imeOptions="actionDone" : 작업이 완료
        // android:imeOptions="actionGo" : 이동
        // android:imeOptions="actionSearch" : 검색 .....
        // => 구현해야하는 리스너에 리턴타입이 존재
        //     리턴타입: boolean(false->키보드가 내려간다., true->키보드가 안내려간다.)
        editmytext.setOnEditorActionListener { v, actionId, event ->    // 매개변수
            txtinfo1.text = "엔터키가 눌려짐"
            when(actionId){ // imeOptions에 설정한 값들이 발생
                EditorInfo.IME_ACTION_GO -> {
                    Toast.makeText(applicationContext, "editmytext의 Action_Go이벤트 받음", Toast.LENGTH_LONG).show()
                    false
                }
                EditorInfo.IME_ACTION_DONE -> {
                    Toast.makeText(applicationContext, "editmytext의 Action_Done이벤트 받음", Toast.LENGTH_LONG).show()
                    false
                }
                EditorInfo.IME_ACTION_NEXT -> {
                    Toast.makeText(applicationContext, "editmytext의 Action_Next이벤트 받음", Toast.LENGTH_LONG).show()
                    false
                }
                else -> false
            }
        }
    }
}
- 끝 -


